Nilo's Workbench lets you generate Roblox-ready clothing textures using AI. This guide walks you through generating a shirt or pants texture in Nilo, exporting it, uploading it to Roblox, and applying it in Roblox Studio.
What you need before you start
You need a Nilo account and a Roblox account with Creator Hub access. Head over to play.nilo.io and open or create a world to get started.
Generate your clothing texture in Nilo
Open the Workbench in your Nilo world by creating a Roblox Character. In the prompt bar at the bottom, type a description of the clothing you want. For example, A studded punk jacket, black and pink. You can also use the Random Idea button to get a starting prompt if you're not sure what to create.
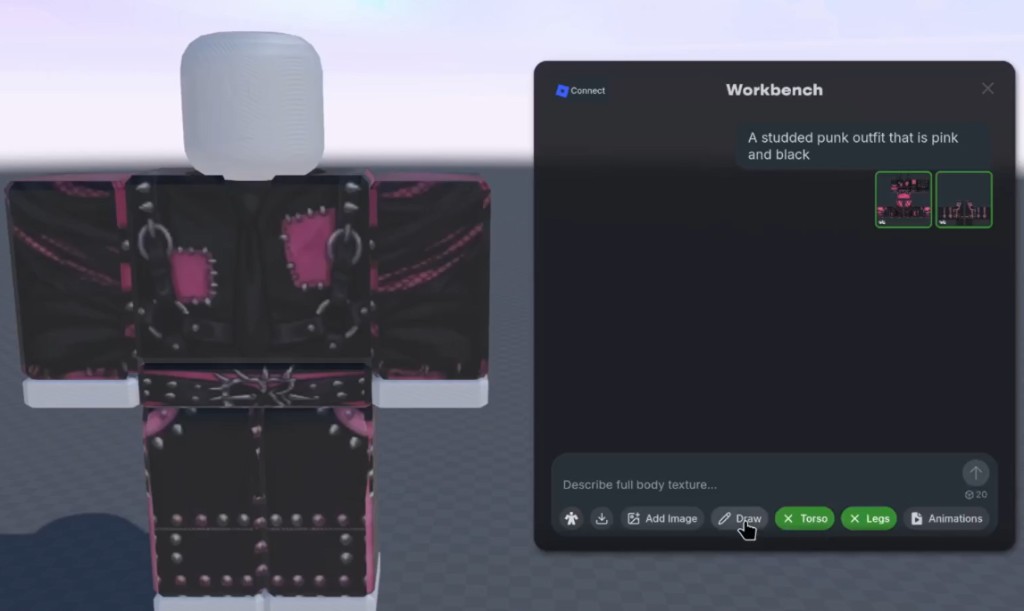
To make further adjustments, type additional prompts or select Draw.
Nilo will generate a flat texture layout showing the front, back, and sides of the clothing item in Roblox's standard UV format. This is intended to be used for the Classic Shirt or Classic Pants type.
💡 Be specific in your prompt for better results. Instead of
a jacket, trya black leather jacket with silver studs and pink trim.
Preview and animate your clothing
Once the texture generates, you'll see it applied to the character in the viewport. Switch to the Animations tab in the Workbench to preview how the clothing looks in motion. You can adjust the Speed slider and trigger different animation poses to check for any issues.
💡 If you're subscribed to Nilo, you can connect your Roblox account and download an .RBMX file directly to speed up the process of creating your clothing.
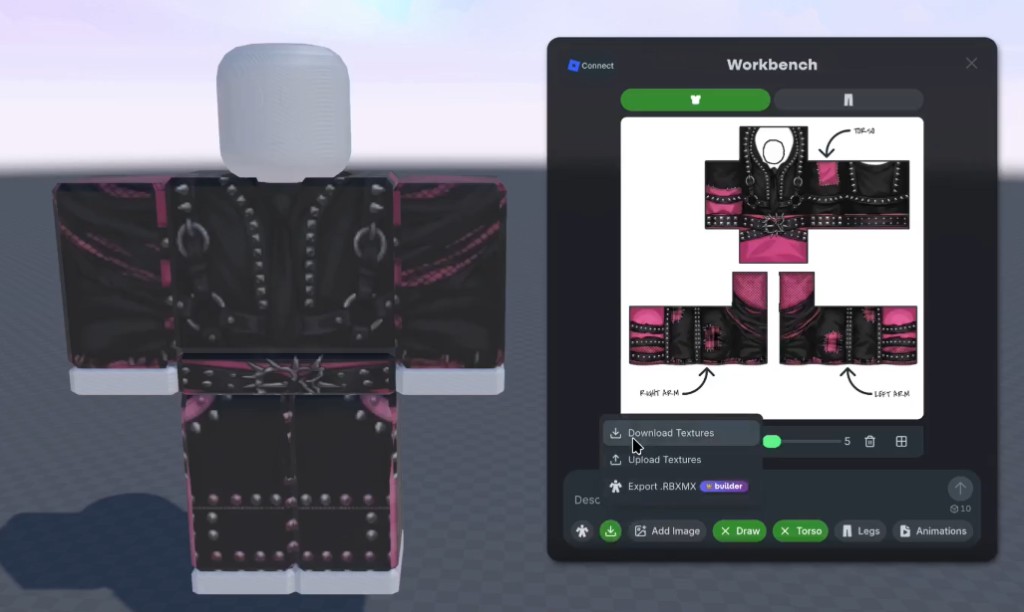
Export the texture from Nilo
Click the export menu at the bottom of the Workbench and select Download Textures. This saves the clothing texture as a .png file to your computer in Roblox's required UV layout format.
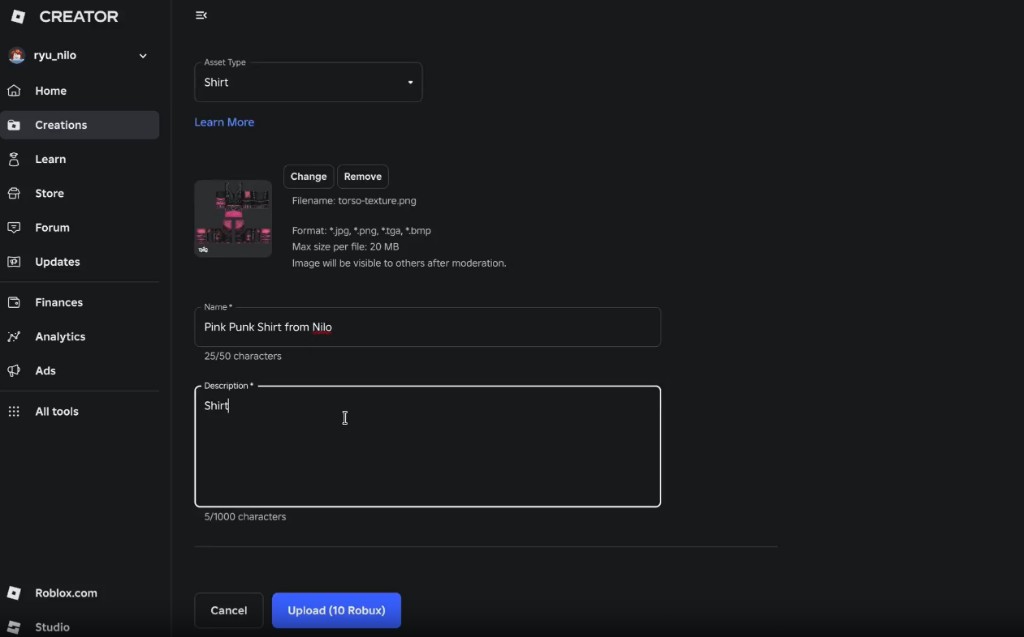
Upload the texture to Roblox Creator Hub
Go to create.roblox.com and sign in. In the left sidebar, select Creations, then open the Avatar Items tab.
Click Upload Asset. Set the Asset Type to Shirt or Pants depending on what you made.
Upload the .png file you exported from Nilo, give it a name, and add a description.
Click Upload (10 Robux). Roblox charges 10 Robux to upload clothing assets. The item will go through moderation before becoming visible.
💡 Roblox accepts
.jpg,.png,.tga, and.bmpformats up to 20 MB per file.
Publish your item to the Marketplace
Once uploaded, open the item from your Creations page. Set the price and description, then Publish Item.
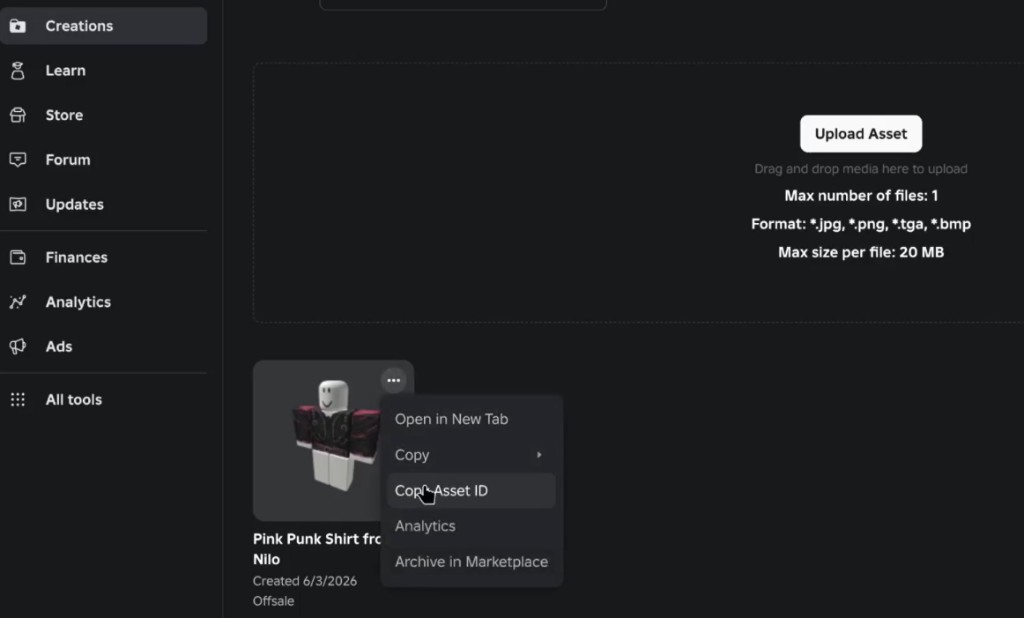
Get the Asset ID
Save this ID — you'll need it to apply the clothing in Roblox Studio.
Apply the clothing in Roblox Studio
After publishing, go back to your Creations page. Find the item, click the ... menu on it, and select Copy Asset ID.
Open your Roblox experience in Roblox Studio. In your Rig model, expand it. Select the Clothing object inside it.
In the Properties panel, find the ShirtTemplate field (for shirts) or PantsTemplate field (for pants). Paste your Asset ID into the field in the format rbxassetid://YOUR_ASSET_ID.
The clothing will appear on the character in the viewport immediately.